6 Strand Raisin Challah Bread
Updated May 24, 2022

I have a confession to make.... I do like playing with dough! I just can't resist sinking my fingers into a lump of soft dough. The obsession goes back to my childhood, where I would lose myself in the simple pleasures of playing with plasticine modeling clay and Play-Doh, rolling and squeezing and shaping it between my little palms and fingers, creating a multitude of mock foods for my teddy bears and dolls.
Many years later, and I still can't resist the urge to fashion my soft bread dough into something more artistic that a regular loaf of bread. So, what better way to put my repressed talents and itchy fingers to good use, than by braiding a loaf of very pretty challah bread.
'Challah', meaning loaf of bread in Hebrew, is a braided bread typically eaten on Shabbat and major Jewish holidays (other than Passover) and at celebrations like Bar Mitzvahs and weddings.
With Rosh Hashanah just behind us and Yom Kippur and Sukkot just ahead of us, I thought this would be the perfect time to share my delicious 6 strand raisin challah bread recipe.

Making this lovely soft dough is a treat in itself, but braiding it into a beautiful work of art is the most therapeutic and satisfying feeling you can imagine. You'll know what I mean when you're taking your golden loaf out of the oven and a warm sense of pride washes over you. It's one of those breads that is designed to impress. And just knowing that you created it with your own two hands is exquisitely gratifying.
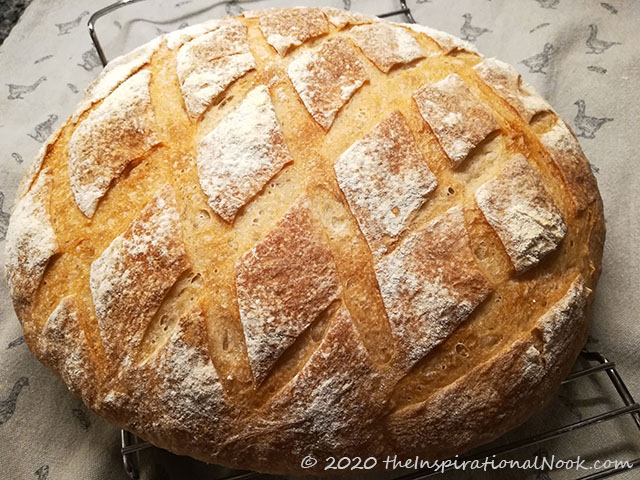
This golden loaf of goodness is made with white flour, egg, sugar, salt, yeast and oil. I added raisins to the dough and brushed the top of the loaf with egg wash to create the beautiful shiny, golden brown top. This 6 strand raisin challah tastes every bit as good as it looks. Whether you're Jewish or not, this is one bread that every baker should have under his/her belt.
Raisin Challah Bread Recipe
Ingredients:
For the dough:
For the glaze:
☐ 1 large egg yolk, lightly beaten
Step by Step Instructions:
STEP 1: PREPARE THE YEAST MIXTURE
- In a large glass, add warm water, and 1 teaspoon of sugar and give it a little stir. Sprinkle in the yeast and swirl liquid in glass. Cover with a cloth and leave it for 5 minutes, until a soft foam develops on top.
STEP 2: FORM THE DOUGH
- In a large bowl, whisk together the eggs and oil.
- In a separate bowl, combine the dry ingredients: flour, salt, and 2 tablespoons sugar and mix well to combine.
- Add the foamy yeast mixture to the egg mixture in the large bowl and mix.
- Start to incorporate the dry ingredients, 1 cup at a time, into the wet mixture in the large bowl. (TIP: Start with a whisk. As the dough forms move to a single kneading hook in hand blender).
- Knead until you have a smooth and slightly sticky dough, (7 to 10 minutes), adding more flour as necessary. You may need to use your hand during the final knead.
- Sprinkle raisins in slowly during the final knead by hand.
STEP 3: FIRST RISE
- Transfer the dough into an oiled bowl and give it a quick roll to coat the dough in oil.
- Cover it with plastic wrap, and let it sit at room temperature for approximately 1-2 hours until it has doubled in size.

STEP 4: FORM THE STRANDS
- Line a baking sheet with parchment paper and set aside.
- Transfer dough onto a floured surface and fold it a few times to create a rectangular shape about 6 x 3 inches.
- Depending on how many strands you want to use for your braid, divide your dough into that many equally sized portions.
- Roll each piece into a ball, then flatten it with your palm.
- Using a rolling pin, roll out the flattened ball into a disk about about a 1/4 inch thick.
- Using your finger tips, roll the disk up into a log. (much like rolling up a carpet).
- Using the palms of both your hands and gentle pressure, roll each log back and forth on the counter to remove the seam and elongate it, until the log becomes a strand 10-12" long.
- The strand should be slightly fat in the center and tapered at the ends to give the challah a beautiful shape.
- To taper the ends of the strands, pick up an end of the strand off the counter and roll it gently between your palms to elongate the end further.

STEP 5: BRAID THE BREAD
- Pinch all the strands together at the top and then start to braid the strands.
- Tuck the ends under.
- Then squish the loaf from top to bottom and side to side.
For detailed step-by-step tutorial with VIDEO see "How to braid a 6-strand Challah).
STEP 6: SECOND RISE
- Transfer the loaf to the baking sheet, cover it with a cloth and let it rise at room temperature.
- TIP: I like to place it in an unheated oven, along with a a pan of hot water to create a warm, moist environment that the yeast loves to work under.
- In about 30 minutes, the challah dough, should have puffed up nicely.

STEP 7: BAKE
- Preheat an empty oven to 375°F.
- Brush the loaf lightly with the egg wash and then bake for 27-28 minutes until the loaf is golden brown.
- Be sure to brush the egg mixture well into the nooks and folds, or else as the challah expands in the oven, that portion will not turn brown.
- TIP: Rotate the tray at the halfway mark so that the challah browns evenly (since the rear of the oven tends to be hotter than the front).
- Remove the loaf from the oven. After a few minutes take it off the tray, and cool it on a wire rack before slicing.

Gut Yontif! (Wishing you a good holiday!)